Slider

Greenhouse Auto Vents

Tuesday, October 6, 2020

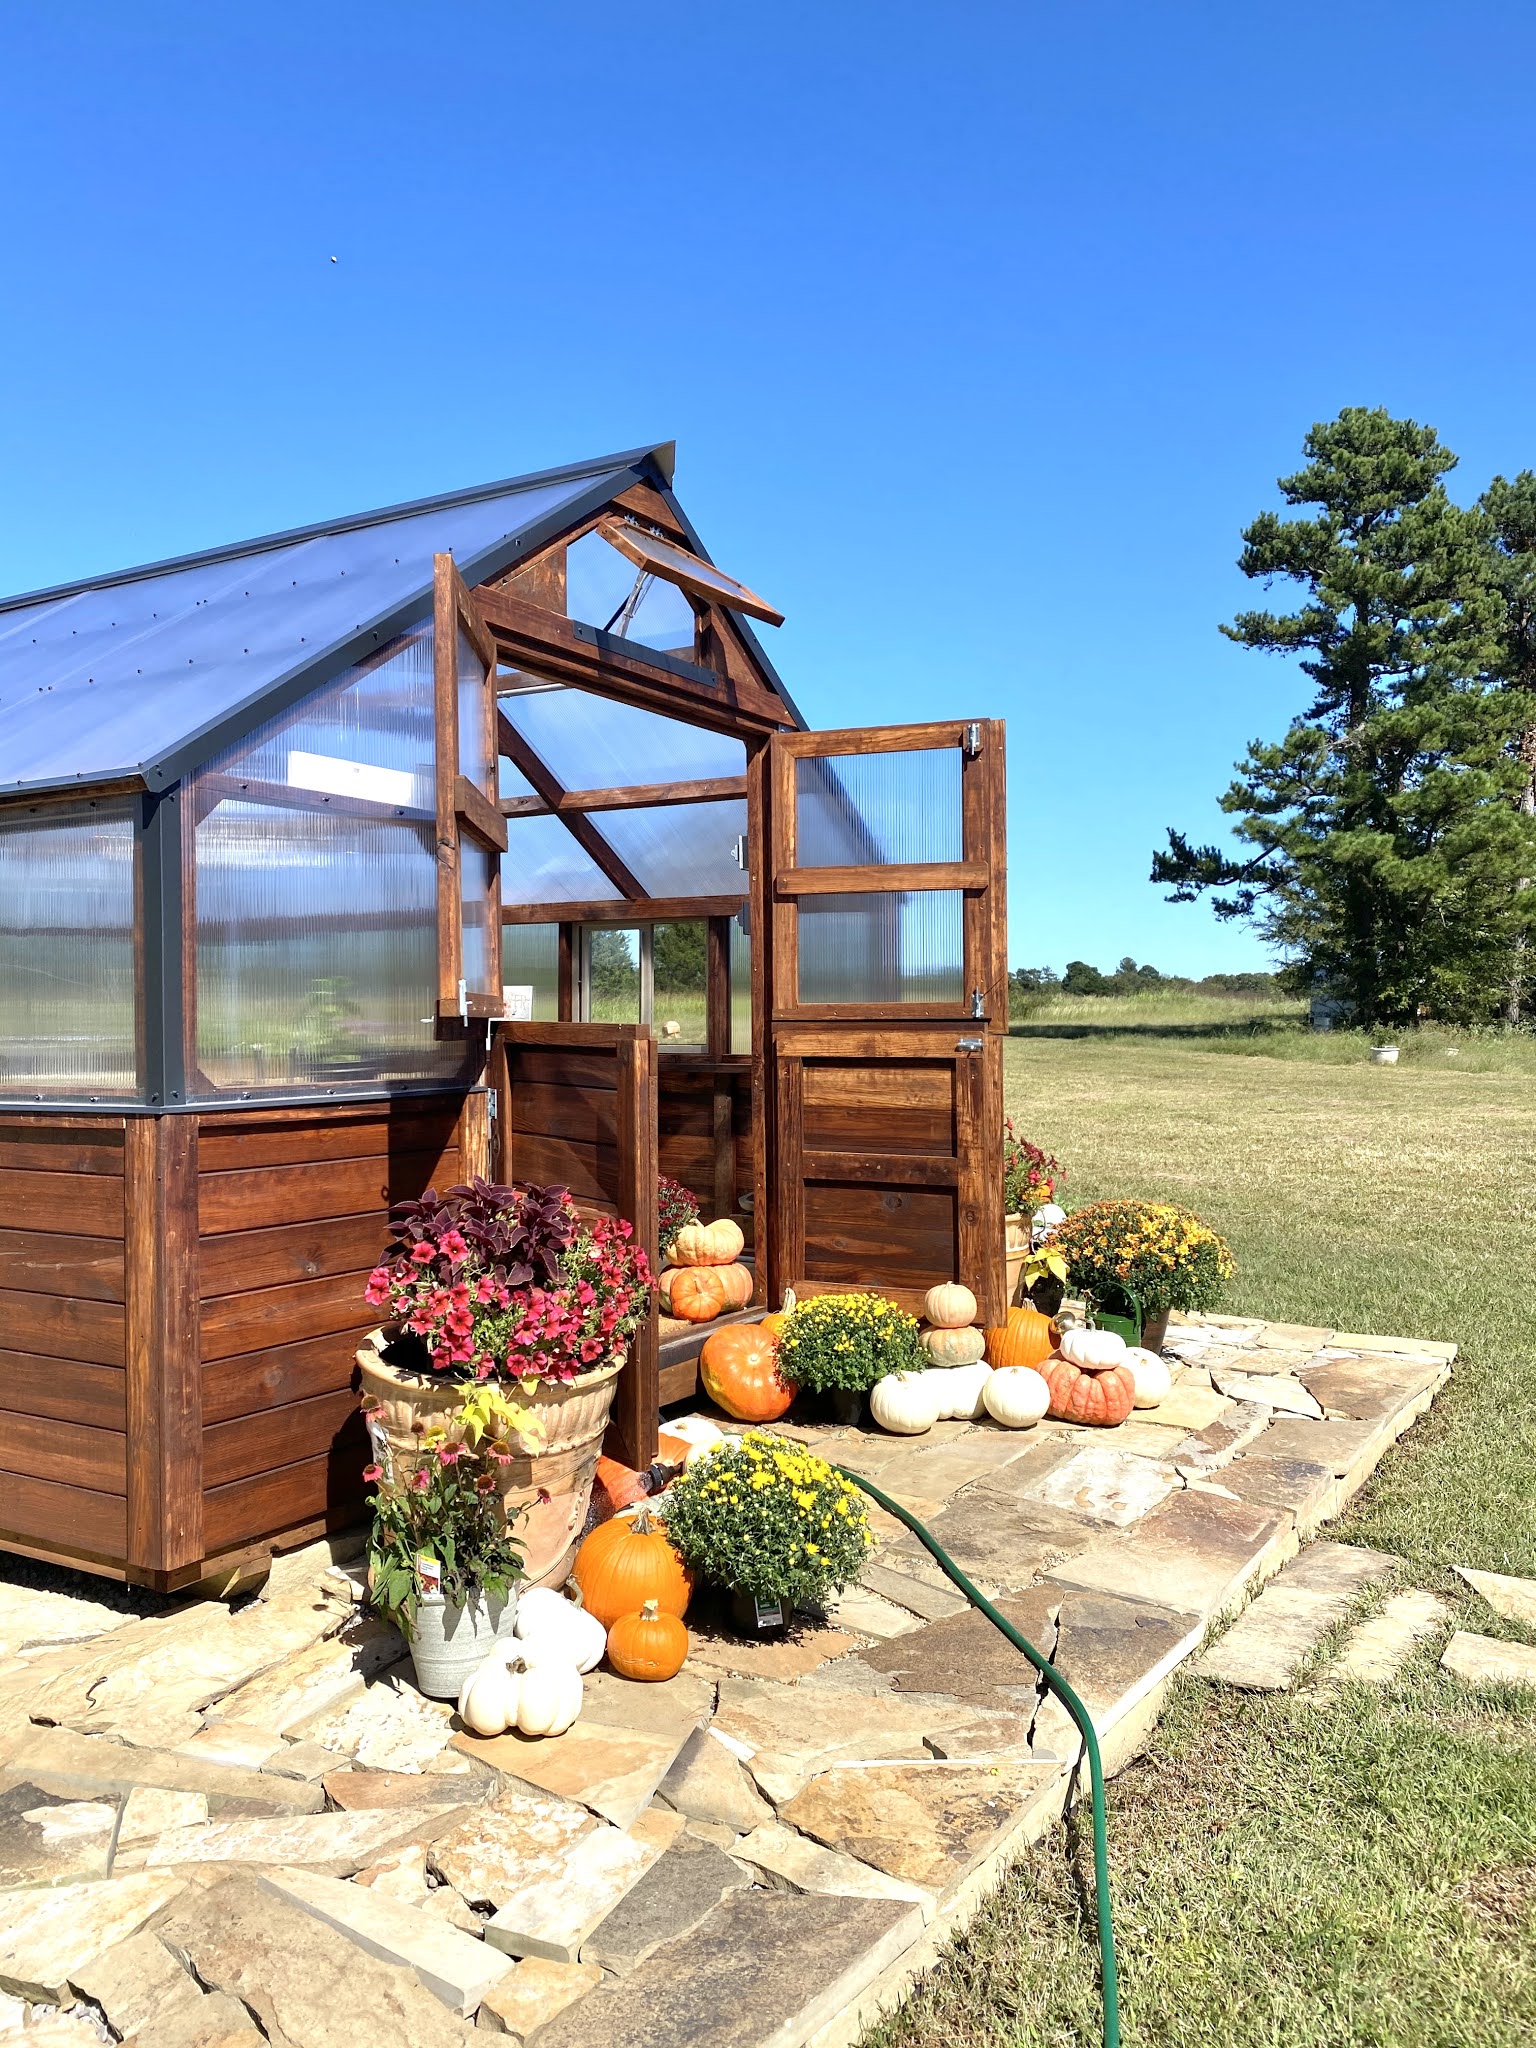
 Automatic vents are a favorite of greenhouse gardeners!  But, early on, many are unaware that they exist and the advantages to your greenhouse growing experience they provide.   They allow simple automation without the need for electricity. 

Yoderbilt Greenhouse Auto Vents

Within a greenhouse environment, airflow, temperature, and moisture levels are foundational. When seeking out a greenhouse, auto ventilation will (or should) come up in the conversation.  For many, it's the first time they've heard of this option.   When designing your greenhouse, you must keep in mind that adequate ventilation, along with the elements mentioned above, is KEY to your greenhouse's success in keeping your plants healthy and thriving both in cold and warm seasons.  


A quick science lesson behind the dynamics of plant health.  A plant must regulate water and carbon dioxide to remain healthy.   Plants carry on with photosynthesis during the day, which leads to utilizing large amounts of water.  During this process, transpiration occurs, which is similar to evaporation.  It is the loss of water from parts of the plant, especially in the leaves.  It cools the leaves' surface and assists in growth and development, allows the movement of minerals from the soil matter into the plant,  and helps control the plants' temperature.  

Yoderbilt Greenhouse Auto Vents

Yoderbilt Greenhouse Auto Vents

Yoderbilt Greenhouse Auto Vents

Yoderbilt Greenhouse Auto Vents

Yoderbilt Greenhouse Auto Vent

Yoderbilt Greenhouse Auto Vent

As explained, plants maintain their leaf temperature through water movement through the plant and the transpiration (similar to a sweating effect) of the water through the leaf surface.  AIR MOVEMENT over the leaf also produces a cooling effect on the entire plant and helps reduce the risk of the plant drying out.   All vital to a healthy plant life.   


Thus, air movement is critical inside a greenhouse.  That means opening a window(s), a door(s), running a fan(s), having an auto vent(s) in place, or all of the above to assist or maximize this process.  Adequate ventilation is a fundamental aspect of keeping plants healthy and more resistant to pest infestations or disease.  


Thus, auto vents are a great addition to your greenhouse as they do just that.  They open and close automatically.  It is a simple addition that will save you time.  As the temperatures change throughout the day, you don't have to worry about being there to open any vents - they take care of it for you with a simple process.  The cylinders of our vents contain beeswax.  As the temperatures increase, the wax expands, pushing the vent window open, and as it cools and shrinks, the window closes—an extremely simple but beneficial process. 


As the benefits described above are tremendous, there are also benefits one would not necessarily think about. One is vital if you have producing plants, and it is pollination.  Even if you are away for the day or an extended amount of time, the auto vents offer a gateway to pollinators.  It allows them to access the plants as they would with open doors.   They also allow the necessary balance of oxygen and carbon levels that are most important to plant growth.  Besides airflow, the temperature is essential to control and is vital to plant health also.   The easiest way to help manage the greenhouse temperature is to open/close windows, doors, and vents.   Since vents are placed in the highest part of our gables to allow for the most heat to escape, they would be a bit cumbersome to open and close daily if they weren't automatic.  It will enable more freedom away from your greenhouse if you can't get there to open a window or door.  The advantages provided are worth exploring! 


How to Fall Prep Your Garden

Wednesday, September 30, 2020

There are currently two schools of thought on preparing your garden for fall and winter.  One in which you have it cleaned and ready to go for spring, and the other, in which you allow it to winter in its natural state to allow advantages of its own reseeding and decomposition process.   Which path will you take and will best suit your needs?  Let's dive in and figure it out! 


Fall Garden Prep


The air is turning crisp, the mornings require a little bit of bundling, and a  hot drink in hand as you make your way to the garden.  Fall has arrived.  This is always a bittersweet time for the gardener.  It's nearing time to say goodbye to the place you've spent so much of your time, worked hard,  and enjoyed the fruits of your labor.  It is also a welcomed time as the unrelenting heat, bugs, and weeds are behind us.  


And, then we have to decide to clean up our space or not.  Fall is a great time to clean up those garden beds, manage soils, and prepare for next year.   A great place to start would be removing all of your gardening support structures, such as trellises, caging, or stakes.  Clean those, and store away for spring.  


Next, you will want to remove your plants or dispose of them appropriately.  For any plants that show signs of disease, you will want to place those in the trash or burn them.   Healthy plants can be removed and put in the compost pile.  


Fall Garden Prep

Fall Garden Prep

 Once the support devices and summer plants are removed, now is an excellent time to add a layer of compost or aged manure to your growing area.  Adding a few inches to the top can result in richer garden soil for next spring and amend as needed at that time. 


Finally, you will clean and store your gardening tools.  When spring arrives, you will be ready to go.  


Fall Garden Prep


The following method is 'nonpreparation preparation.'  The biggest negative to this method is the aesthetic component.  It will present as somewhat scraggly and unkept look throughout the winter as it continues to break down.  However, the benefits are worth considering. 


In this manner, you leave it alone.  You would remove, clean, and store all of the support structures as described above.   Then remove any plants that are diseased and dispose of in the same manner as mentioned.  You will keep all the healthy plants in place to winter in your garden beds. 


A great benefit is natural seeding.  Once your plants have dried and seeded and you have collected what you want, they will then drop and start the resowing process to emerge next spring.  You may have such a prolific seedling crop; you likely have to thin or share the seedings.  This is especially beneficial if the plants you love are the ones that are allowed to drop and seed.  It takes a lot of work out of the process for you next year. It's always a fun process to see what is sprouting up after the dead of winter. 


Fall Garden Prep

Next, the natural decomposition of the plants, leaves, and roots enrich the soil. This will aid in a better soil composition for the next year and the years that follow if you continue this process.  So, it is up to you, but now is the time to begin prepping your garden in one manner or the other for next year.  

I Want to Order a Greenhouse, Now What?

Monday, September 21, 2020


It's that time of year! Tomorrow is Fall, Y'all!  

We've been receiving messages and calls daily, stating, "We're ready to order, now what?" 


Boston Fern Greenhouse

Yoderbilt Greenhouse


Based on years past, October is usually the busiest month here at Yoderbilt. Although it's the tenth month of the year, it kind of sneaks up on everyone. And, the phones start ringing at a quicker pace. 

  We wanted to take you through the ordering process and let you know how simple it is. Even before being ready to order, the best place to have your questions answered is to give our office a call and speak to Angela. She has used her greenhouse now for almost ten years and will share her big learning curve freely with all of you.  And, in her words, it will always be a learning process, a tweak here, a discovery there.  But that's part of the fun of it.  So, for any of your questions, she is the best place to start. 

Then, there comes the point you are ready to order. Again, please pick up the phone and give our sales team a call. We have those who know exactly what they want, and we take them through the ordering process until it is complete.  And we have those who still have many questions, and we explore those until you design it the way that will best fit your needs and budget. There is ZERO pressure.  

They will send you an estimate; you will review it, and any needed changes can be made. Once the order is placed, a deposit is paid with the remaining balance being due when your delivery is scheduled.  There is also a monthly payment plan option available. 

We do service a limited number of states at this time as our product is delivered fully assembled and ready to use.

It really is as simple as that! 


New Greenhouse Owner Series - A Sneak Peek into the New Greenhouse - Guest Blogger Shannon Walker

Thursday, August 27, 2020

Ya'll I am IN LOVE with my new Yoderbilt Greenhouse! It truly is a dream come true!   

I've been so busy, I haven't had a lot of time to do all the things I've planned, but I have enjoyed some amazing mornings at sunrise in the cooler temperatures of an Arkansas August; coffee in hand of course.  It's been completely dreamy! 

I am just going to take you through some pictures I've taken over the last few mornings....I'll be back with all of the details soon!  Just some eye candy for now. 

My very first morning, I repotted some rosemary.  Such a lovely morning! Enjoyed it so much. 


Rosemary Greenhouse

Rosemary Greenhouse

Rosemary Yoderbilt Greenhouse

Rosemary Yoderbilt Greenhouse

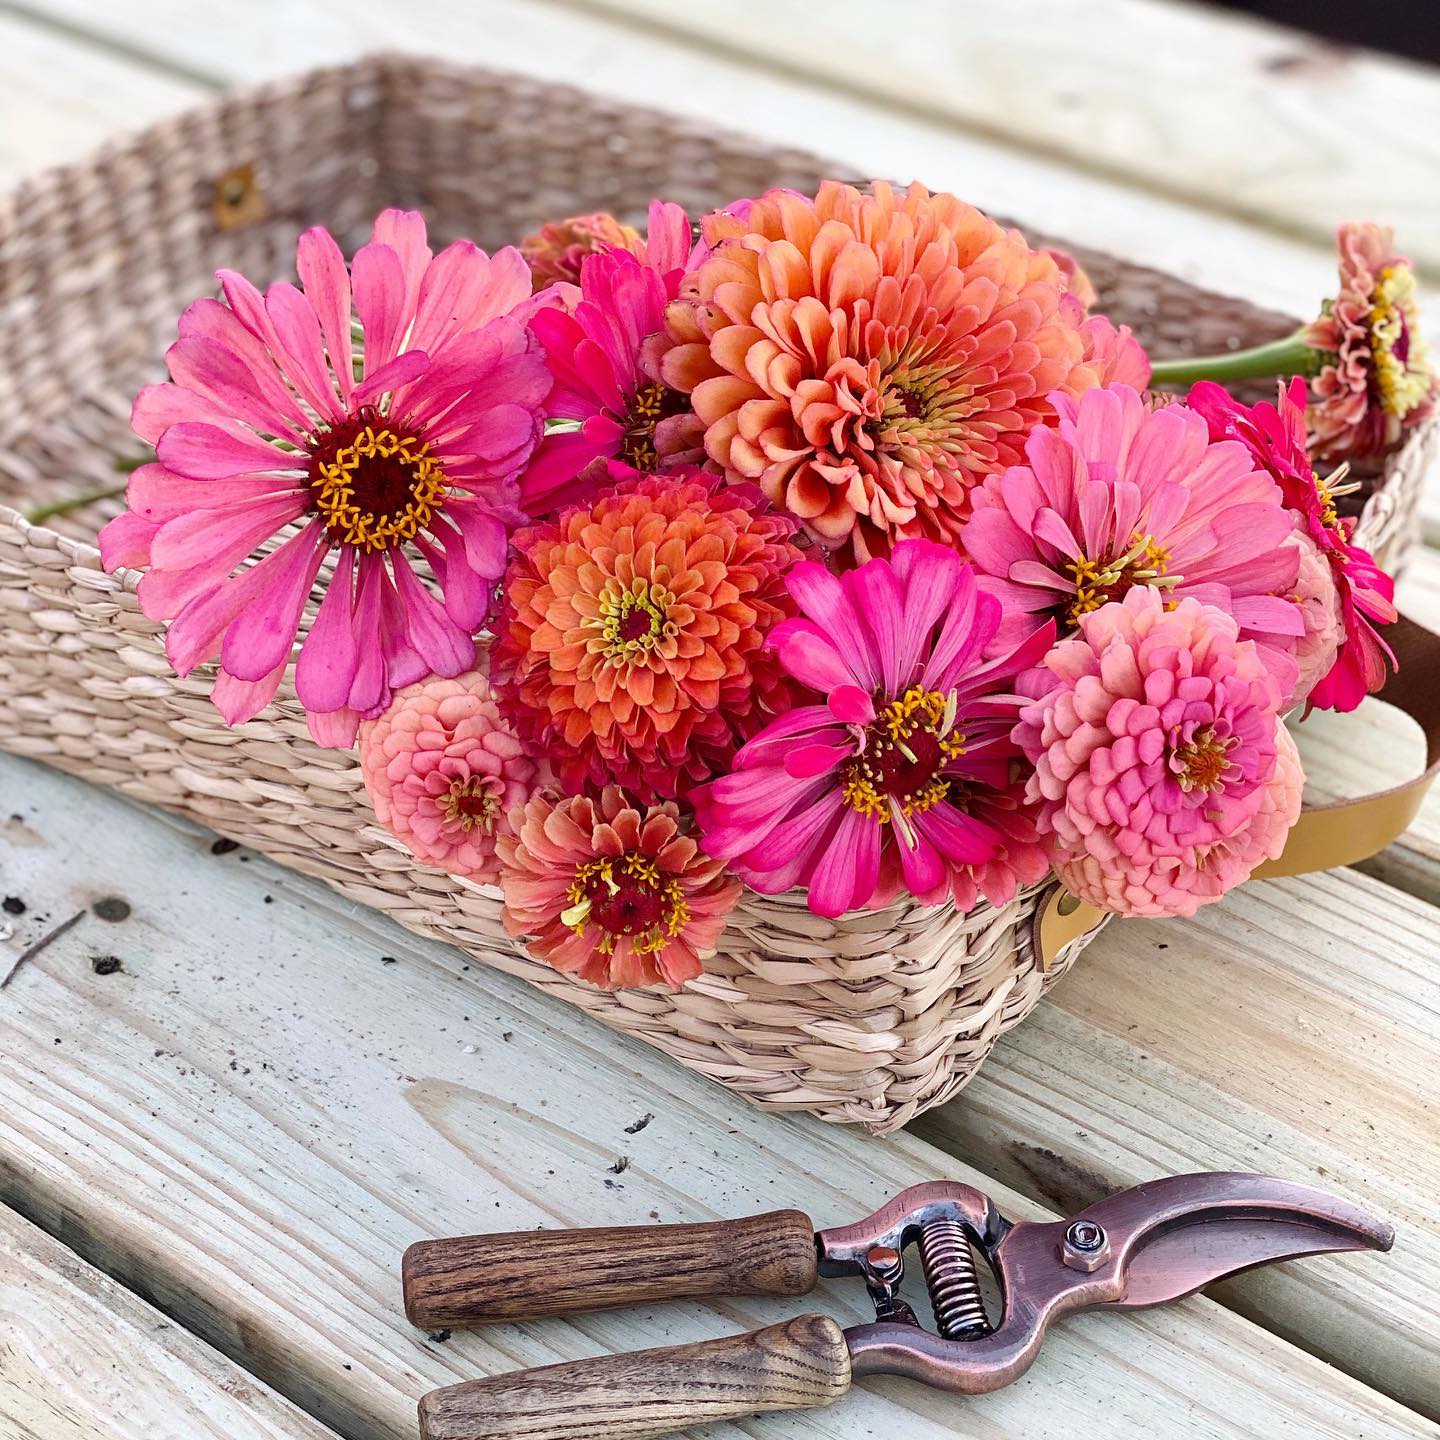
Next up, I arranged some zinnias from my garden patch.  So nice to do in a place other than my kitchen.  

Zinnias Floret Flower Farm Yoderbilt Greenhouse

Zinnias Floret Flower Farm Yoderbilt Greenhouse

Zinnias Floret Flower Farm Yoderbilt Greenhouse

Zinnias Floret Flower Farm Yoderbilt Greenhouse

Zinnias Floret Flower Farm Yoderbilt Greenhouse

Zinnias Floret Flower Farm Yoderbilt Greenhouse

Zinnias Floret Flower Farm Yoderbilt Greenhouse

Zinnias Floret Flower Farm Yoderbilt Greenhouse

Zinnias Floret Flower Farm Yoderbilt Greenhouse

Zinnias Floret Flower Farm Yoderbilt Greenhouse

Next up was a morning we continued to "fluff it up" - we had planned on having dinner out there, but we had a rainy day and evening, so, we'll do that this weekend & I'm so looking forward to it as we have cooler temperatures on the way over this next week!  

**My chandelier ended up being too small, so a larger one will be here Monday and I'll use this one elsewhere.   

Yoderbilt Greenhouse Farmgirl Flowers

Yoderbilt Greenhouse Farmgirl Flowers

Yoderbilt Greenhouse

Yoderbilt Greenhouse Farmgirl Flowers

Yoderbilt Greenhouse Farmgirl Flowers

Yoderbilt Greenhouse Farmgirl Flowers

Plotting out the flagstone, will actually begin laying it this weekend. 
 
Yoderbilt Greenhouse Farmgirl Flowers

Yoderbilt Greenhouse Farmgirl Flowers

Yoderbilt Greenhouse Farmgirl Flowers

 Just a little peek!  It won't just be a pretty place to retreat - but, will also house all the veggies we will grow over the winter and early spring.  I could not be happier with it - such a well-made and beautiful greenhouse!  I'm looking forward to spending a lot of relaxing time out there over the years to come! 


New Yoderbilt Greenhouse Owner Series - Preparing Your Site for Your New Greenhouse - Guest Blogger Shannon Walker

 The excitement is in the air!  It feels like Christmas, in August! 

Yoderbilt Greenhouse

(my greenhouse at the Yoderbilt manufacturing site in Mansfield, Arkansas awaiting delivery to my home!) 

We've selected our location - an area that is flat and sits in full sun as we plan on growing 'all the things' and utilizing as much winter sun as possible.  Our greenhouse will sit with the double Dutch doors facing south and will sit completely unshaded until almost sunset. It is also situated near a water source. 

Greenhouse Location

Greenhouse Location

Because our ground was flat, we didn't have to have any dirt work done.  If you have an area that is not flat and dirt work is in the budget, that is recommended.  If you don't have the budget for it, there are ways that the delivery team can assist once placing the greenhouse in its location that will help with that. 

We measured out the area we wanted with extra room in the front and sides for our 12x16 greenhouse.  We then put down commercial grade landscape fabric directly on top of the grass to prevent weed growth.  We edged the area with some rock we purchased from a local quarry (this was not a have-to, but I wanted to contain the gravel).  Next, we had a dump truck load of clean gravel brought in which filled the area up 3-4 inches deep.  

Yoderbilt Greenhouse Foundation

Next, we phoned Yoderbilt, that our site was ready and delivery was scheduled at that point.  My husband trimmed trees the length of our driveway the night before delivery so their driver wouldn't have any difficulty bringing it in.  

The rest was easy - their very talented driver had our new greenhouse in place in a matter of minutes, but was very receptive to exactly how we wanted it to be situated on the gravel pad.  As he drove away, I was up in the greenhouse planning and plotting moving in over the upcoming weekend. 

Yoderbilt Greenhouse Delivery

Yoderbilt Greenhouse Delivery

Yoderbilt Greenhouse Delivery

That was the way we opted to go with our foundation in conjunction with the recommendations of the Yoders.   There are various ways to prep your site that include a concrete pad, directly on the grass, etc.  The best approach is to make a quick call to Yoderbilt and give them the details of your site and they can provide their best recommendations.  

More of my new Yoderbilt greenhouse journey to come! 

New Yoderbilt Greenhouse Owner Series - Choosing a Location for your Greenhouse

Friday, July 31, 2020


Hey, everyone! It’s Shannon, giving you a little update on my very own journey to a Yoderbilt Greenhouse! 


Zinnia Field Pollinator Butterfly


First off, I officially got the call from Angela to go over my electrical package a few days ago when I was working from home.  I hear her on the phone with so many of you so often, I know how great she is walking you through the process and she did the very same thing for me. So, as soon as the electrical package is finished - it will be ready for delivery. 

Since I am on this side of the fence right now, let’s talk about my location choice. I’ll be honest, I’ve been a little anxious in picking the perfect spot. But, once I talked it over Angela - I knew exactly where I wanted it to be. Some opt for shady areas, but because my main goal with my greenhouse is to over-winter my plants, grow food throughout the winter, and start 100% of my spring seedlings - I wanted my placement to be in full sun up until right at sunset so I could maximize the heat of the sun. And, for the sake of transparency - I will be taking A LOT of photos for Yoderbilt...so, I wanted a spot that would allow for maximum winter sun - but, I also wanted to be able to photograph my greenhouse with views of sunset and sunrise. 


Greenhouse Location Field

Greenhouse Location Field

It is an area to the right of our home. We have a lot of clean up to do as it extends past our garden area. A little peach and plum orchard will sit to its left. 


Zinnia Field

Zinnia Field


As mentioned before, I am going with Travis’s recommendation for weed barrier and gravel. In addition to a simple gravel foundation, we will be bringing in some extra dirt to the area because of things I want to add to the area over a period of time. That part isn’t a have-to, but something I want to do in order to add additional raised beds, which I’m a big fan of! 


Location: ✔️

Next up: minimal dirt work, weed barrier and gravel.

I’ll take you along every step of the way! ❤️ - Shannon, Guest Blogger 


New Greenhouse Owner Series - Guest Blogger Shannon Walker

Tuesday, July 28, 2020

Hey, everyone! This is Shannon - I'm a member of the Yoderbilt team and Angela's best friend...since FOREVER. We started Kindergarten together! They are truly family to me! So working with them every day has been an absolute dream.come.true. 


Zinnia Field


Here's something FUN that I wanted to take you along on! I have ALWAYS wanted a greenhouse. When I was twelve, I spent many summer days up the road at a beautiful farm of one of our neighbors. It sat upon out town's hill looking over into the next little community. It was breathtaking. 


Mr. and Mrs. K were an elderly couple who loved all things garden; I fell in love. I had always grown up with gardens around me, but what I experienced on their beautiful farm, changed me. If I went missing {and, I did more than once}; my parents knew where to find me. 


Mr. K would give me plant clippings often. I decided I would have my own greenhouse. I arranged a corner of my dad's METAL building with no true source of sunlight into a space for my plants. I was SO proud. For the FEW days they survived, it was glorious. And, then painful. I put that greenhouse dream on hold. 


Well, since Angela and Travis built their very first greenhouse (under that front yard shade tree), I've wanted a Yoderbilt greenhouse. But, due to a different career path, I literally had no time to enjoy one. My work hours were crazy. When I officially joined the team in January, my goal was to have a greenhouse by fall as I was still pretty busy transitioning from my own business to the team on Yoderbilt. I thought by then that I would have my new schedule mapped out and be settled in. Well, I have, and I am! 


Best Friends


Guess who has a greenhouse coming??!?! I am BEYOND thrilled and want to take you along my journey as I'm new to it too! I have spent a lot of time in Angela's and learned so much from her, but I still have MUCH to learn. She is so encouraging as she tells me she still learns every day. 


But, like you, I have all of the questions too! I knew I wanted to get a jump start on the fall rush, and I can happily report that my greenhouse is almost ready, and we are waiting for our foundation work to be done. I am going with Travis's recommendation of a weed barrier and about 3 inches of clean gravel. There are all different types of variations you can use, but that's the way Angela's greenhouse is set up, so I'm going with that. It's simple, allows for excellent drainage, and it just works! 


I will start posting pictures at the time our foundation work gets started. And, I'll take you through the process from that point on. Today, a little push mower should arrive so I can keep my greenhouse area neat and tidy. 


What color combo do you think I got? Hopefully, I'll be able to post that soon as it is driving down my driveway!


AND all of that to let you know that I understand what it feels like now to be at the point of being a greenhouse owner. Finally, I have ALLLLL the questions that you do! So, I will pop in and update you as I go. Just picking out my spot took me FOREVER. 


I am also their photographer - so plan on an overload of pictures too!  I will say that because I'm a photographer, I am a VERY visual person. So, I've ordered fun stuff for the inside, including a sweet chandelier! Next to my lawnmower (ha!), I have a list of favorite things I will share too!

And, feel free to ask me any questions along the way. If I haven't figured it out yet, I have the greenhouse pro sitting next to me most days. 


xoxo,
Shannon

Powered by Blogger.

Search This Blog

Theme Designed By Hello Manhattan
|

Your copyright

All Rights Reserved Copyright Yoderbilt Designs 2020